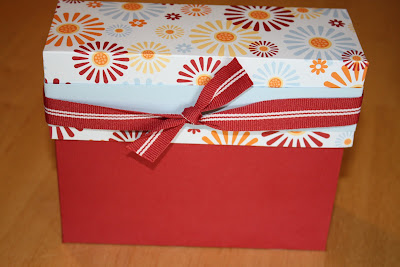
Tuesday, September 30, 2008

Snow Swirled

I almost posted another Halloween project today- but I thought I would change it up a bit and show you one of the Christmas cards that I made a couple of weeks ago.


I LOVE the Snow Swirled stamp set!!! Here is a picture of all the images in the set.


I made this card by stamping the snowflakes in Stazon Ink on Glossy White cardstock. I then used a sponge dauber to add Baja Breeze to the entire panel and some pacific point to the centers of the snowflakes. Everyone on my newsletter mailing list will be receiving a tutorial on this technique next week!!!!


Recipe:


Stamps: Snow Swirled


Paper: Kiwi Kiss, Basic Black, Glossy White


Ink: Black Stazon, Baja Breeze, Pacific Point


Other: Kiwi Kiss Satin Ribbon

Monday, September 29, 2008

Pencil Box Tutorial

I had several people ask for instructions on making the pencil box that I posted last week. So here they are!


Supplies needed:


11x 2 1/4 black cardstock


Ghostly Greetings Designer Series Paper: one that is 2x 3 3/4 and a second one that is 2 x 3


Halloween Frights Stamp set (coming out in the mini on Wednesday!)


Black Ink


1 inch circle punch


small tag punch


Kiwi Kiss Striped Ribbon


Silver Brads


Instructions:


1. Score the cardstock at 6 3/4 and again at 7. Fold on the score lines.


2. Add the larger piece of patterned paper to the front of the box and the smaller piece to the back inside panel.


3. Add a brad to each side of the front of the box to keep it closed.


4. Wrap Kiwi Kiss Ribbon around the box to hide the brads.


5. Use stamps and punches to decorate the front of the box. I attached my embellishments with demensionals.


Simple!!!! I can make 45 of these, right?!!! Did I mention that I have to make treats for 2 other classes as well?! CRAZY!!!


See you tomorrow!

Friday, September 26, 2008

Yum Yum Pillow Box!!!


It's the end of my week of Halloween projects : (  No worries- worries, I still have a month to show a few more! I haven't even started the Halloween scrapbooking ; )


AND- since I had several people ask how to make the pencil box- I will have a short tutorial first thing next week!!!


This is such an easy project. If you have the Big Shot that is!!! And this is just one of a about a dozen projects that I have featured in my Big Shot newsletter. This newsletter is available for everyone who purchases the Big Shot from me! Click HERE for more info about the Big Shot and about the free newsletter!


I will not be blogging this weekend. I will be spending time with my family on Saturday and then I have a scrapbook club on Sunday. But I will be back on Monday!!! Have a fabulous weekend! Make time to be creative!


Recipe:


Stamps: NONE (but I could have stamped something as a tag- but I was in too much of a hurry!)


Paper: Ghostly Greeting Designer Series Paper


Other: Big Shot, Pillow Box Die, Kiwi Kiss Striped ribbon, M & Ms (my fave!!!)

Thursday, September 25, 2008

Spooky Pencils

I was a at Wal-Mart a couple of weeks ago and I came across these cute Halloween pencils. They were 12 of a $1 and I bought a bunch because I thought they would be better treats for my son's preschool class than the ususal candy. I designed this litle pencil box to put them in. What do you think? Am I crazy to make 40 of these for preschoolers?!!! : )


I am being a bit of a tease as the bat stamp comes from a set called Halloween Frights. It is in the Holiday Mini Catalog which starts on October 1st!


Recipe:


Stamps: Halloween Frights


Paper: Ghostly Greetings Designer Series Paper, Basic Black, Pumpkin Pie, Kiwi Kiss


Ink: Basic Black


Other: Kiwi Kiss Striped Ribbon, Circle Punch, Tag Punch

Wednesday, September 24, 2008

Trick or Treat?

I am keeping with my Halloween theme for this week and I thought I would share this very simple card that I made several weeks ago.


I made this card with the Big Shot and the top note die that is exclusive to Stampin' up! All I did was fold my cardstock in half and then position the die so that it went off of the fold. It easily went through both layers of cardstock. I then ran a piece of paper from the Ghostly Greetings pack through the Big Shot with the same die.


Now check out the stamps I used! Aren't they adorable?! As soon as I saw this set in the catalog, I knew it had to be mine!!!


I used this stamp set in the fun tutorial that I am sending to everyone who ploaces an on-line order with me. Don't miss out! Click on the Shop button for instructions on placing your order!


Recipe:


Stamps: Tasty Sweet


Paper: Ghostly Greetings DSP, Basic Black, Whisper White


Ink: Basic Black


Other: Big Shot, Top Note Die, Kiwi Kiss Striped Ribbon, Markers: Pumpkin Pie, Old Olive, So Saffron

Less than a week left....


You have less than a week to buy brand new stamp sets from the Fall/Winter catalog for 15% off! This speacial ends September 30th. Don't miss out!!!


And don't forget that if you place your order on-line- you will receive an email tutorial for a really fun Halloween treat!!!

Tuesday, September 23, 2008

Big Shot Tips and Tutorials!

Two posts in one day!!! Pretty amazing, huh?


If you have been coming to my blog for long- then you know that I am in love with my Big Shot Die Cut Machine! I am so excited to be able to make more elaborate projects in half the time!!! I don't even have to score the paper for myself!!!!


Do you want the Big Shot?


Now is the time to buy as I have an amazing special for you!!! Anyone who purchases the Big Shot Die Cut Machine from me will receive a newsletter with tutorials, tips, and lots of different projects you can make with your Big Shot. This newsletter is full of ideas that will help you get the most from your Big Shot!!! The newsletter is valued at $49.95- but I will send it to you for FREE when you order your Big Shot!!!


Click HERE for more information about this special and about the Big Shot!


*the newsletter will be emailed out begining on October 1st so order your Big Shot NOW

Visit my new blog!

I just wanted to post one last time to remind you that you will need to re-register at my new blog: www.stampingmommyof4.com in order to get notification of when I update my blog.

I am posting a lot of cute Halloween projects on my blog this week- so make sure you check it out!

Peppermint Patty Halloween Treat

Here is another one of the treats that the ladies at my October class can choose to make. I think this one is going to be a hit!


This fun little box holds three peppermint patties which are decorated with the Batty for you stamp set and some Kiwi Kiss scallops.


There are several tutorials out there for boxes like this one. I used several of them and just made some minor changes to make it faster!


Would you like my tutorial??? All you have to do is sign up to receive my newsletter on the top left side of this page. I will be including the tutorial for this exact project in my October newsletter!


Do you want to make it even easier on yourself??? Then just plan on coming to my class on October 17th and get all of your Halloween treats made in one evening!

Monday, September 22, 2008

Halloween Treat!


Isn't this Halloween Treat Basket CUTE?!!! And it was so simple to make with the Big Shot and the Basket and Blooms Die.


I am going to be having a Halloween class at my house on October 17th. Each person will receive a pack of the Ghostly Greeting Designer Series Paper and some black cardstock. Then they will be able to go from station to station making different Halloween treats!! And the best part- they can make as many of each treat as they like or until they run out of paper!


This is just one of about 5 projects they will have to choose from. I will be showing more of them this week as I focus on Halloween projects!

Friday, September 19, 2008

Every Day is a Gift

Hi everyone! I had a very full day that included a fun meeting with my MOPS group and a few hours in the ER with Makenzie. She is doing ok but has a high fever. I am exhausted! But I really wanted to share this fun project with you that I made for the ladies at my MOPS table. Each month we give the ladies a new bible verse and so I made them a cute box to collect these verse cards. And of course- I had to decorate the verse card to match the box!


Bible Verse Box


Bible Verse Card


I printed the verse on my computer and then added the stamping on top of the words.


I hope the ladies at my table enjoyed!


Recipe:


Stamps: Inspired by Nature


Paper: Haiku, Old Olive, Whisper White


Ink: Old Olive, Pumpkin Pie


Other: Always Artichocke Marker, White Tafeta Ribbon, Silver Hodge Podge Hardware, Silver Brads, Large Oval Punch, Tab Punch, 1 3/8 circle punch

Wednesday, September 17, 2008

Big News!

I have a brand new blog!!! I have loved blogging so much that I have decided to upgrade my blog. So I will no longer be posting here. Check me out at my new site:

http://www.stampingmommyof4.com


I hope you enjoy the new look!

WELCOME!!!

Welcome to my brand new blog! I am so excited to share this with you. I had no idea that blogging would become such a huge part of my Stampin' Up! business! So I have outgrown the free blogger service and I am starting a new adventure!


It will take me a bit to learn all the ins and outs! But stick with me! I have big things planned!!!


Sorry no eye candy today. Still no camera! But I am getting it back tomorrow and I have lots of new things to show you!

School Dayz

WARNING: My camera is still at my mom's house and I am unable to use photo shop. I guess my computer doesn't have enough ram to run the program because my computer always freezes when I open it. All this to say- the pictures aren't so great!!!

But I am LOVING this scrapbook layout! This is the layout that both of my scrapbook clubs will be making this month!


Do you see that cork board?!!! I bought a roll of cork and then I ran a piece through my Big Shot with the top note die! Isn't it awesome! And it went through the Big Shot so easily! And that little clip is from the clip assortment. As soon as I saw it at convention- I knew that I would use them in my school layout!


I attached the pictures to Riding Hood Red Cardstock. Then I put the carstock onto the layout with sticky strip on just three sides so that I would have a pocket for my journaling tags.


I cut the stars out with my Big Shot too!!! Fist I took a piece of chipboard and glued some of the Washington Apple DSP to it. Then I ran it through my Big Shot with the Star Die. Simple!!!


I hope my scrappers love it as much as I do!! If you are interested in joining one of my clubs, send me an email or leave a comment. You don't need to live near me.


Recipe:


Stamps: ABC Lower Alphabet


Paper: Washington Apple DSP, Bashful Blue, Riding Hood Red, So Saffron, Whisper White


Ink: Riding Hood Red


Other: Big Shot Die Cut Machine, Star Die, Top Note Die, Cork, Clip Assortment,Riding Hood Red Striped Ribbon, Circle Punch, Chipboard, Spiral Punch, Staples


REMINDER: Anyone who orders the Big Shot through my website this month will receive a Big Shot Newsletter that has about a dozen different projects and tips for how to get the most from your Big Shot. The newsletter will be sent out by the end of the month!!!


Click HERE to go to my website. Then Click on Shop Now at the top right corner of the home page.


September Featured Project

I have to fess up that I have been so busy that I have not had time to stamp today. But now that I have gotten all my busy work done- I will have lots of time to stamp tomorrow! So today I thought I would show you this adorable project that Stampin' Up is featuring this month. It is a pillowbox made with a Sizzix die and the Bigshot!


Instructions (shared by www.stampinup.com)

1.Cut pillow box from So Saffron card stock using Pillow Box Bigz die and Sizzix Big Shot. Assemble pillow box.

2.Cut pillow box from So Saffron Patterns Designer Series paper using Pillow Box Bigz die and Sizzix Big Shot. Cut out top half of pillow box and adhere to assembled pillow box.

3.To create tag, stamp "Cheers" in Tangerine Tango ink on Whisper White card stock. Punch flowers from Chocolate Chip, Tangerine Tango, and Gable Green card stock using Boho Blossoms punch. Trim two petals off Gable Green flower to resemble leaf. Layer and adhere flowers to each other with leaf on the bottom. Adhere So Saffron square button to center of layered flower.

4.Adhere flower to tag using Stampin' Dimensionals. Adhere tag to pillow box.

5.Tie Tangerine Tango 5/8" striped grosgrain ribbon around front of pillow box.


I can't wait to make lots of the cute pillow boxes and fill them with holiday candies!!!

I'm Back...Kinda

 am physically back from Creating Keepsakes Scrapbook Convention- but mentally- that is a whole 'nother thing!!! I had so much fun with my up-up-up line, Amy at the convention! We did make and takes and we met so many awesome scrappers!!! I just love sharing my love for Stampin' Up! You should have seen their faces when they saw what the Big Shot could do! And we also got to meet about a dozen other demos. I cannot believe how many demos are in the area that I have never met!

I am also VERY happy to welcome Jill Balok to my downline family. She just sat down at the make-and-take table and said "I want to do Stampin' Up!" Her husband was at the convention with her (what a good sport!) and at lunch he came up and asked me some more questions about his wife becoming a demo! I just had to laugh! About an hour later, she called to tell me that she had signed up on my website. It's that easy!!! My downline family continues to grow and I am so blessed to work with these awesome women! If you ever thought that you would like to make money doing something you love or if you just want to get a discount on all your papercrafting supplies- then you should really consider joining my team!!! Check out the link on my side bar!


OK- on to some stamping!!! At church today I found out that out new pastor, also a family friend, is in ICU with heart problems. So after a wonderful nap today- I made him a card and brought it to him. He loved it! I love when my stamping can bless others!!! It's awesome! But before I show you the picture, I have to warn you that my DH left my camera at my parent's house. I have had to resort to using my old broken camera!!! And then I decided I would fix them in Poto Shop but for some reason my program isn't working either!!!! So here is the card.


I CASED this one from Heather Summers. She posted a similar card back in January and I have been in love with it ever since!

Recipe:
Stamps: Pun Fun
Paper: Muirfield DSP (YUMMY!), Baja Breeze, Kiwi Kiss, Water Color Paper
Ink: Black Staz On, Baja Breeze
Other: Baja Breeze Striped Ribbon, Aquapainter

Big Fun with the Big Shot

Have I mentioned yet that I am in LOVE with the Big Shot?! I love how fast you can make professional looking projects. I never used to make 3d projects and lately I have been making treat containers left and right! Check this one out. I actually designed it myself!


There are pepermint patties in the cello bag in the middle. Ain't it cute?! Do you want to know a little secret? This is one of the many projects that I will be including in my Big Shot Newsletter. This newsletter will include about a dozen different projects with tutorials using the Big Shot. The newsleter will really show readers how to use the Big Shot and get the most out of the die cut machine.


Would you like to get this newsletter? It's easy! Anyone who purchases the Big Shot through me- will receive the newsletter (a 49.95) value for FREE!!!!


Just click here and then click on "Shop Now" in the top right of the page. Enter Item number 113439.


If you are going to Creating Keepsakes Scrapbook Convention in Phoenix- then I will see you soon!


Recipe:


Stamps: None!

Paper: Holiday Treasures DSP, Riding Hood Red

Other: ig Shot Die Cut Machine Top Notes Die, Snow Flakes from the Holiday Mini, Rhinestone Brad, Cello Bag, Staples


Have you ever run out of adhesive or cardstock in the middle of a project? Did you wait until the next time you came to class to order the product because that we easiest?


Well- no more!!! You can easily order all of your favorite Stampin' Up! products from the comfort of your own home! Even in the middle of the night in your jamies!! Isn't that awesome?!


All you need to do is click here. It will take you to my Stampin' Up! website where you can click on the "Shop Now" button on the top right of your screen. And then you will be able to find all of the products from the Stampin' Up! Catalog easily!!! And when you place an order- it will be shipped directly to your home!


I love the personal contact that I am able to make with my customers. Doing home workshops and teaching classes is so much for me. So no worries- I will continue to do what I have been doing! But now you have even more options to ordering your papercrafting supplies!


AND since I am anxious to have you try the new online ordering- I have a special gift for you!!! The first 20 people who place an order with me on-line will receive a FREE tutorial from me. The tutorial is for a very cute Halloween candy container that I have designed!


On Line Ordering is here!


Have you ever run out of adhesive or cardstock in the middle of a project? Did you wait until the next time you came to class to order the product because that we easiest?


Well- no more!!! You can easily order all of your favorite Stampin' Up! products from the comfort of your own home! Even in the middle of the night in your jamies!! Isn't that awesome?!


All you need to do is click here. It will take you to my Stampin' Up! website where you can click on the "Shop Now" button on the top right of your screen. And then you will be able to find all of the products from the Stampin' Up! Catalog easily!!! And when you place an order- it will be shipped directly to your home!


I love the personal contact that I am able to make with my customers. Doing home workshops and teaching classes is so much for me. So no worries- I will continue to do what I have been doing! But now you have even more options to ordering your papercrafting supplies!


AND since I am anxious to have you try the new online ordering- I have a special gift for you!!! The first 20 people who place an order with me on-line will receive a FREE tutorial from me. The tutorial is for a very cute Halloween candy container that I have designed!


September Class By Mail Mini Album

I'm back!!! It was such a busy weekend and it just flew by for me! But I am back with info about my September Class by Mail project. This month the class is a 14 page 6x6 paperbag album. We all took lots of pics this summer, right? Well don't let them just sit on your computer card! Get them printed and in an album in just one evening! I think this would be a great project to do together a family! And it is cheaper than dinner and a movie!!


What the kit includes:
6x6 sewn paper bag album
16 sheets of 6x6 textured cardstock
pre-cut double-sided patterned paper
3 sheets of die cut adhesives from the Pina Colada Simply Scrappin kit
Riding Hood Red Striped Ribbon
Tangerine Striped Ribon
Step-by-step instructions and pictures for putting your album together.


My favorite part about making paperbag albums is that you can put extra's inside the bags! Sometimes I put extra pics, tags with journaling, or even ticket stubs and maps!!! This album would be a fantastic gift for grandma and grandpa!!


This class will only be available until supplies run out so order your's NOW!


ETA: Thanks for the fantastic response. The class is sold out! I will hae a new class by mail in October!


The kits will begin shipping the week of September 22nd.

Upsy Daisy!

I am loving this stap set Upsy Daisy!!! And it just so happens that Stampin' Up! is offering this set (and many other) at a discount right now! Just click on the Never Before Seen Savings Flier on my side bar for more info!

I inked up the daisies wih Baja Breeze and then used a sponge dauber to add a little Not Quite Navy to the tops of the flowers. By the way- I used my Big Shot with the Top Note Exclusive Die to cut the white panel that I stamped on! I love how easy it is to add pizzazz to my projects now!

By the way- I have to tease you a bit and tell you that their are going to be some very exciting things coming to my blog in the next few days. So keep checking back!!!

Recipe:
Stamps: Upsy Daisy
Paper: Urban Garden DSP, Whisper White, Baja Breeze
Ink: Baja Breese, Not Quite Navy, Kiwi Kiss
Other: Big Sht Die Cut Machine, Top Note Die, Kiwi Kiss Satin Ribbon, Sponge Dauber

Stationary Gift- Part 2

Sorry I couldn't get the rest of the pictures posted last night. Blogger was giving me some trouble.

So these are the ful-size A2 cards that were in the box I showed yesterday. As you can see- they were super simple. The DSP and ribbon really made the cards a breeze!


Once I finished the stationary box- I need a matching gift bag for the project. I used a white bag by Stampin' Up! and covered it with more of the Washington Apple DSP and some Bashful Blue Cardstock. The Ridinghood Red Striped ribbon finished of this simple bag!

I brought the gift to Jerry. He was such a man! He didn't even open it up! Oh well! Lucy will open it and she will enjoy it I am sure!!!


I will be back tomorrow with my September class by mail project. It is a 6x6 Summer Scrapbook that is perfect for scrapping all those summer pics!


Stationary Box Gift

The Pastor at our church, Jerry, and his wife, Lucy, are leaving us and moving to Virginia. They are such nice people and they will be miss for sure. I wanted to make them a gift and decided this was the perfect time to try out this stationary box tutorial that everyone has been making on SCS and in blogland. I am so pleased with the way it turned out!

I used a sheet of Ridinghood Red textured cardstock and a sheet of the Washington Apple Designer Series Paper.

This is the box all closed up.
And when you take off the lid- this is what you find!
There is a little book that Lucy can use for addresses or birthdays. There is also a little envelope for stamps and a matching pen. (I just put some of the Designer Series Paper into a clear pen. I then added a little loop of the DSP on the box to hold the pen.
These are some of the small notecards that are in one of the pockets on the box.

Here are some tags that are in another pocket. I used Flower Fusion on these along with some Rhinestone brads.


I am having some issues with blogger right now and I can't seem to upload my pics of the other cards in the box or tha matching gift bag. Sorry! Come back tomorrow and I am sure I will have them posted!


Trick of Treat

I am having so much fun making Halloween treats for the charity event I am participating in at Phoenix Children's Hospital next weekend. I am in LOVE with the new Halloween DSP!!! I already know that I am going to need more! This little treat box is one of my favorites so far. It is a 2,4,6,8 box with the new DSP, new Kiwi Kiss ribbon and the Batty for You stamp set. It was very simple to throw together!


If you are interested in more of my treat containers- please sign up for my email newsletter on the left side of my blog. I will be sending out my newsletter this week and it has lots of NEw and fun features! It includes a tutorial for a Halloween treat, some scrapbooking tips, classes by mail and so much more!

Recipe:
Stamps: Batty For You
Paper: Ghostly Greetings DSP, Pumpkin Pie, Whisper White, Kiwi Kiss
Ink: Basic Black
Other: Kiwi Kiss Striped Ribbon, circle punch, scallop circle punch, white gel pen, cropadile, sticky strip

The Love Affair with my New Camera Continues!

I have taken a 1000 pictures since getting my new camera less than a month ago!!! That is a new record for me! I just can't stop clicking!! Hello, my name is Jamie and I am addicted to my camera!

Today we aired up the kid's plastic pool and let them swim on the back patio. So, of course, I had to take pictures. Now, some friends have noted that I have taken tons of pics of my kids swimming. And I have scrapped a lot of them too. I just can't help it! The kids are happiest in water! Plus- outdoor pictures are so much nicer and when you live in AZ- you have to be in water to be outdoors during this time of year! So here are MORE swimming pics!

Danika
Laynee
Kyler
Makenzie
 

Keeping it Simple Saturday

 didn't have anything ready to show you today so I made a quick trip to the stamp room. I used all the colors and paper that I had on my desk from last night's class and added the Say it With Scallops stamp set. I made this one in about 5 minutes and that includes the design time. Even though it is very simple, anyone would love to get this one in the mail!

Recipe:
Stamps: Say it with Scallops
Paper: Urban Garden DSP, Kiwi Kiss, Baja Breeze, Whisper White, Not quite Navy
Ink: Kiwi Kiss, Not Quite Navy
Other: Square Scallop Punch, 1/2 inch circle punch, Kiwi Kiss Satin Ribbon